Well, I have compiled a list of MUST HAVES for most kid-art crafts. These are things readily available in most stores and are easy to store and inexpensive to buy. Some of these things you probably already have in your home. Most of these items can also be stored in a fairly small plastic container and won't take up too much space in your home but the uses and impact during the summer or Spring Break is so worth it.
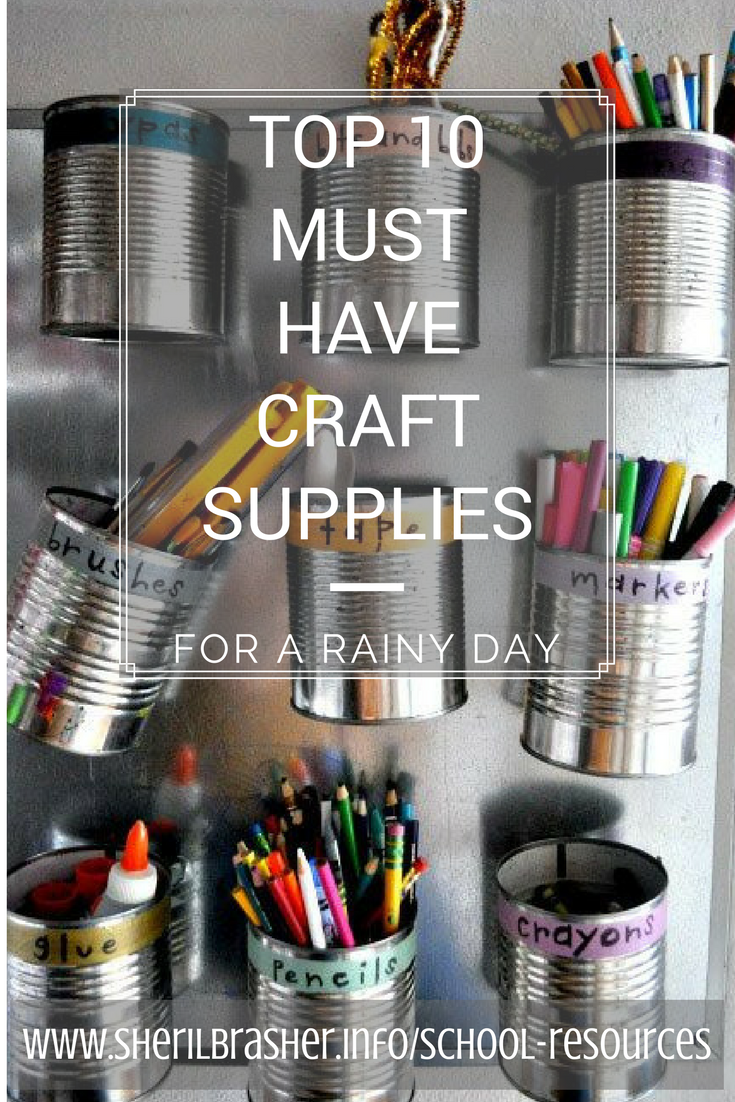
So many people often ask what kind of stuff should you keep on hand for impromptu rainy day craft times. It's actually funny because our school is located on our campus (think university) and yet when it's a rainy day either all of our kids come to school or pretty much none of them do. So parents want to know what they should have on hand that's not too expensive (we are all support-based missionaries) and can't take up too much space (many of us live in small dorm-style apartments).
Well, I have compiled a list of MUST HAVES for most kid-art crafts. These are things readily available in most stores and are easy to store and inexpensive to buy. Some of these things you probably already have in your home. Most of these items can also be stored in a fairly small plastic container and won't take up too much space in your home but the uses and impact during the summer or Spring Break is so worth it.
0 Comments
When I taught preschool in the states years ago before becoming a missionary and subsequently a preschool director, I was always on the lookout for creative, unique and incredible gifts for our parents. I was looking for ideas that would be meaningful, that the parents would want to keep forever and ever. You know what I mean, the gifts that are handmade and are still hanging in your parent's house even now. Now, the younger the kid, the easier it is, just paint their feet & hands and make those prints into something cute & seasonal. We did that a lot and the parents went CRAZY for them. But the older the child, the harder it is because it needs to be something that the child can do themselves but still has the same feeling as the hand & footprints. So I put my thinking cap on, as usual and a memory flashed. Remember those old silhouette pictures on the walls of our grandparents or great-grand parents. You know the ones. Sometimes they were in a picture frame on the way but sometimes they were on a bookshelf or a piano. Occasionally they were a part of a necklace or a broach. They look sort of like this: When I taught the 4 year old class, I wanted to give the parents something that they could remember their kids at age 4 that was unique. So I began looking at these silhouette pictures and trying to figure out a way to make them. I wanted the kids to be able to help me as well. Now we came up with TONS of different ways to do this but I think this one is the best and easiest way of all. SUPPLIES: Digital Camera Printer (black and white is fine) white card stock black paint, tempera or washable is best for small kids paint brush To get started, simply take a profile picture of your child(ren). This means take a picture of the side of their head. You want to frame the picture so that their head takes up most of the shot. You want to be able to see the outline of their eyes, nose and mouth (this is what make the silhouette so special). This is easiest to do in front of a window because you automatically get the shadow/backlight feel that you want. Another option is just in front of a blank wall. With your computer, blow this picture up to a 8x10. You want it to take up the whole sheet of paper. It doesn't matter if the picture is a little (or a lot) blurry as long as you can see the outline. (You will understand later). Print this picture onto a sheet of White Card Stock (really thick paper). Have your child paint the entire back side (not the side the picture is on, you will need to be able to see that) with black paint. Allow this to completely dry. The paper will probably curl on the edges. For now, this is fine. Once the paint is completely dry, you can cut out their silhouette. Simply use the picture as a guideline and cut along the outline of their face, including any clothing or out of place hair. After you have cut out the face you may want to place in a heavy book to help flatten out the image (as it may have curled in the drying process). When I did this for the preschoolers and parents, I attached the silhouette to a piece of white card stock and mounted that onto a larger piece of black construction paper. This gives it a more finished, professional look. Do this for everyone in the family and frame them. You can make smaller ones (4x6 or 5x7) for a card or a table-top. Every time I do this project with a class or a student, I am ALAWYS shocked at how much they look like the child. And every time I do this project, the parents always beg me to do the same for their other children. I do like giving this gift for a particular class like the 4 year old end of the year gift. This way it is something that each child will get and give parents something to look forward to. It's like a tradition. Leave a comment below with an idea that you do that your class parents gush over or something that you made that your parents still have prominently displayed. Even better, leave a link. I'd love to hear about it. If you liked this post, make sure you stick around and take a look at some of our recent posts that you may also enjoy. Fall is the best time for so many things; football, holidays, and fun preschool crafts. In class we've been talking recently about all things fall and getting ready for our Thanksgiving Feast. Our students at Little Builders Preschool, a ministry of YWAM (Youth With A Mission) San Diego/Baja, are in charge of decorations. We've been extremely busy getting ready and these Silly Scarecrows were too hard to pass up. Plus who doesn't love handprint crafts. Parents eat that stuff up, am I right?? They are super cute though so I can't complain!
One of our teachers this quarter saw these on Pinterest and we decided to try our hand at making them. {See what I did there, hehe?} I think ours turned out super cute, what do you think? It's that time of year, Fall. My favorite season of the year. I've often wondered why I love Fall so much. Is it because of the cooler weather? Is it because of the beautiful colors on the trees? Is it because Fall equals College Football {ROLL TIDE!}?
I like to think it is all of those things plus as a preschool teacher, I've realized that there are crazy amounts of fun holidays and therefore fun preschool crafts to be done in the Fall. I mean you have Apple Season, Mexican Independence Day, Pumpkin Season, Harvest Parties, Halloween, Fall Trees, Fall Animals, Veterans Day, Thanksgiving, and of course Christmas. Have you noticed that there are so many cute crafts available for all of these units?? This year for our Thanksgiving Feast with YWAM (Youth With A Mission) San Diego/Baja, our preschool students at Little Builder's Preschool are in charge of decorations. We have been busy making turkeys, fall trees, Mayflower Journey, placemats, Thankful Candles, Silly Handprint Scarecrows, etc*. The list literally goes on & on. *Click on the Links for tutorials on how we made each of these. It's officially November which means that Thanksgiving is just around the corner! YAY!! It shouldn't be any secret that Fall is my absolute favorite time of year. It has all the awesome, fun and easy-to-make-crafts-for holidays all rolled into just a few short months.
I was looking through Pinterest today for some new cute craft ideas for our students at the Little Builders Preschool, a ministry of YWAM San Diego/Baja, in Mexico to make to help decorate our tables and walls for the upcoming Thanksgiving Feast. I came across this awesome tablescape with a sweater covered glass vase. Well being that I was in preschool craft mode I instead saw a cardboard tube vase covered in sweater. I immediately thought how cute would it be to make some "vases" out of the 100s (ok 1000s) of cardboard tubes we have lying around. And what if we wrapped said "vases" in twine or string. Not only would these look cute (hopefully) but would also act as a GREAT addition to our sensorial stations. A few months ago our YWAM preschool class at Little Builders Preschool (a ministry of YWAM San Diego/Baja) was studying recycling. We learned all kinds of really cool things about reusing, reducing and recycling. We even sang and danced along to the Jack Johnson song, 3 Rs.
One of the really fun things that we did was make paper. We had never done it before but watched a couple videos on how paper is made and how construction paper is made from recycled materials. We decided to jump in, experiment and see how it would go! Here's what worked for us: A few weeks ago, our last week before Spring Break, the preschool class of Little Builders Preschool, a ministry of YWAM San Diego/Baja, learned all about the weather. We learned some really fun things about clouds, even what some of their names were. Clouds are pretty rare around here so it is always very exciting when we get to see them in the sky. We also learned some really cool things about the wind. We learned that the wind is like God, we can't see it but we know it's there because of the actions that it causes and because we can feel it. God is the same, we can't see Him with our regular eyes but we can see that way He is moving by the people around us and we can feel Him in our everyday lives. Since we were studying the wind and it was a really nice windy day, I thought why not make a kite! Now I first was thinking the traditional diamond shaped kite with the poles and the string, etc. This didn't seem very practical for us as we didn't have anything to use as support poles and I honestly didn't think we'd be able to do it. So I looked through our awesome art closet & checked out what supplies we do have. I found paper bags, colorful streamers, popsicle sticks and ribbons. I put my thinking cap on and with a little inspiration, came up with these really cute kites. Want to make one of your own? Here's how we did it!
|
AuthorI am on an amazing adventure traveling the world with Jesus. After 7 years of teaching preschool in Alabama, God called me to the mission field in Mexico full time. I led short-term missions trips for 6 years and the Lord opened the door for me to mix both of my passions, missions and teaching. I am now the director of Little Builders Preschool and we will soon be opening a full International K-12 school. The current students are missionary kids but will be open to the local community in the future. As a full-time missionary, I do not receive a traditional pay check. I rely on the generous support of friends, family & people like you. As any teacher does, much of what we use in our school is purchased by me out of my own personal funds. Please consider making a tax-deductible donation to our ministry and help our students reach their potential in education.
Featured Blogger at:*Add a note stating it is Staff Support for Sheril Brasher or Little Builder's Preschool
Archives
November 2020
Categories
All
Visit Our Friends: |